Lost Mine of Phandelver Maps: Essential Tools for Your D&D Campaign

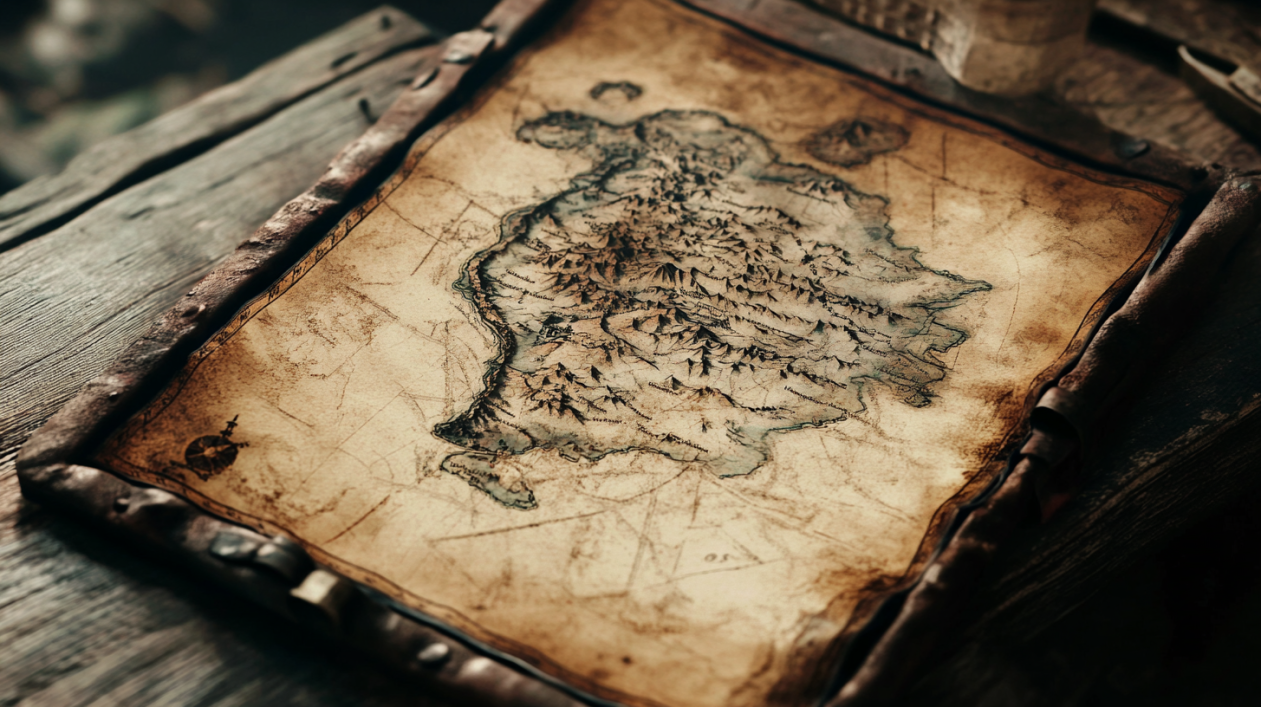
Detailed maps for the “Lost Mine of Phandelver” make your journey in the campaign way easier. They do this by visually showing the setup of key locations, which helps you plan tactics better. But, did you know these maps are not only in official D&D books? Many fellow adventurers have created their own versions and shared them on the internet.
So, roll your dice, it’s time to enter Phandalin, keep an eye out for the goblins.
Our website provides a wide array of detailed and high-quality maps for the Lost Mine of Phandelver, including player maps with hidden locations removed, custom maps, and wilderness and dungeon encounter maps. These resources are designed to enhance the gaming experience and provide a visual aid for both players and Dungeon Masters.
Maps in Lost Mine of Phandelver
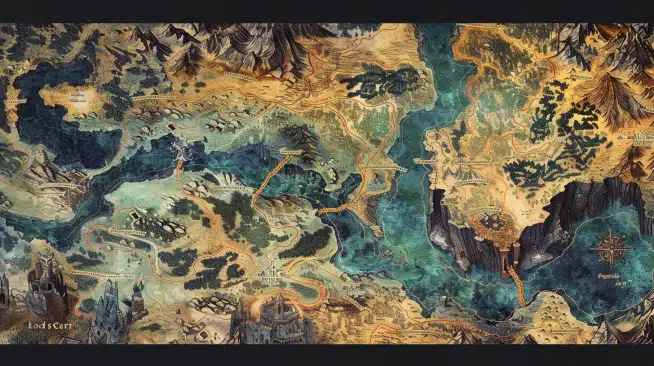
Maps are not just tools used by Dungeon Masters to guide players through the adventure, but they are also essential components that bring the story to life. They provide a tangible representation of the fantasy world, enriching the players’ imagination and grounding them in the narrative.
When it comes to “Lost Mine of Phandelver,” maps are crucial for visualizing and understanding the landscape, connecting with key locations, and navigating through pivotal encounters.
The official D&D sourcebooks offer detailed maps that depict the various locations and environments within Phandalin, Wave Echo Cave, and other significant points of interest. These maps serve as visual aids for both the DM and players, allowing them to immerse themselves in the rich details of the campaign.
Whether it’s a treacherous trail or a mysterious cave, these maps provide an anchor for the unfolding story, making it easier for everyone at the table to comprehend and appreciate the setting.
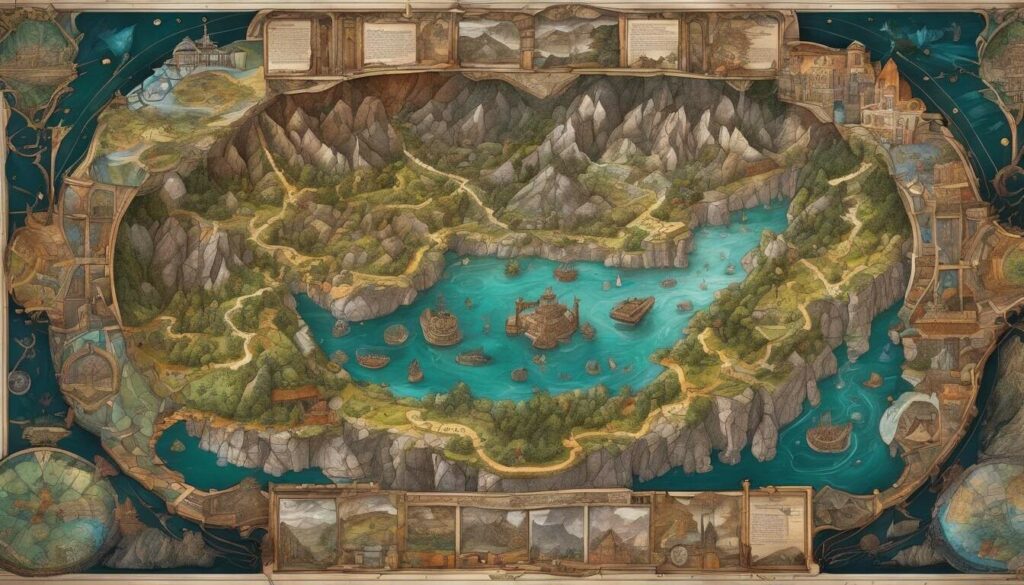
Furthermore, online platforms and fan-generated content have expanded the map options available to players. These supplemental resources often provide alternative perspectives on familiar locations or introduce entirely new areas to explore.
For instance, custom maps created by skilled cartographers offer unique interpretations of iconic settings, breathing fresh life into well-trodden paths and unveiling hidden secrets waiting to be discovered.
Consider the added value of a custom map depicting Cragmaw Hideout with intricate attention to detail that captures the essence of this pivotal location or a regional map highlighting important landmarks surrounding Phandalin. These meticulously crafted renderings not only elevate visualization but also spark creativity and curiosity, enticing players to engage deeply with the world around them.
In essence, maps in “Lost Mine of Phandelver” extend far beyond mere navigational aids; they are foundational elements that catalyze immersion, enrich storytelling, and invite exploration. Their multifaceted nature imbues campaigns with depth and dimension, fostering an unforgettable gaming experience for both players and Dungeon Masters alike.
Now that we’ve explored how vital maps are in bringing adventures to life, let’s journey into uncovering specific locations within “Lost Mine of Phandelver” that are emblematic of its rich storytelling.
Distinct Locations on the Map
The map of Lost Mine of Phandelver is more than just a set of pretty pictures. It serves as a gateway to numerous thrilling locations, each with its own unique story waiting to unfold. Let’s take a closer look at some of these intriguing places:
Town of Phandalin
Phandalin acts as the central hub of activity in this adventure, where characters find rest, resupply their gear, and receive quests and missions from various non-player characters (NPCs). However, it’s important to be cautious as Phandalin holds its fair share of secrets and threats lurking in the shadows.
Cragmaw Hideout
This is where the players will have their first taste of combat as they venture into the lair of the Cragmaw Goblins. The hideout sets a fast-paced tone for the adventure to follow, providing an exciting site for the initial encounters.
Redbrand Hideout
Tucked away beneath Tresendar Manor, the Redbrand hideout presents a more clandestine and dangerous location. Here, players can uncover sinister plots and engage in clever tactics as they infiltrate this secret base of operations.
Tresendar Manor
The mystery surrounding Tresendar Manor offers a rich opportunity for exploration. Players can uncover forgotten lore, unravel historical secrets, and confront formidable foes within this enigmatic locale.
The Lost Mine of Phandelver
As the ultimate goal of the adventure, the Lost Mine promises untold riches and dangers in equal measure. Navigating through its treacherous depths ensures an enthralling experience for players, filled with traps, puzzles, and adversaries to overcome.
Each location in the Lost Mine of Phandelver map serves as a sandbox for both dungeon masters and players to mold their own stories. These settings are not just static backdrops but dynamic stages that adapt to the actions and decisions of those who dare to explore them.
It’s here where heroes will forge alliances, trade blows with adversaries, unearth ancient artifacts, decipher cryptic messages, and ultimately claim victory against cunning foes or succumb to devastating defeats.
Uncovering these locations reveals that each site doesn’t just serve as a mere marker on a piece of paper; they offer players experiences that will define their journey through Phandalin.
Now that we’ve walked through these diverse locations on the map, it’s clear that each spot isn’t just scenery–each holds tantalizing stories and challenges that await daring adventurers.
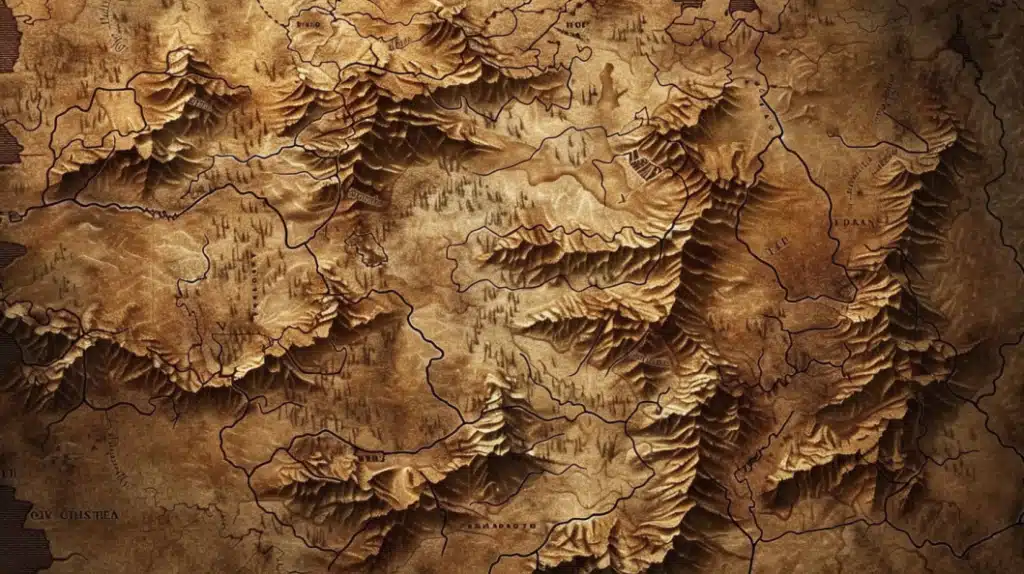
Dangerous Encounters in the Wild
Venturing into the unknown can be exhilarating, but it’s important to remember that danger often lurks in unexplored territory. The wilderness surrounding Phandalin presents a variety of treacherous encounters, each with their own unique set of perils—ranging from traps to hostile creatures, demanding vigilant strategy.
Types of Encounters
The wild landscapes around Phandalin are teeming with potential dangers. Players could encounter anything from cunning goblins setting up ambushes to packs of vicious wolves stalking through the underbrush. Different terrains present different threats, with forests concealing dangerous predators and caves potentially harboring devious traps left behind by nefarious individuals.
When designing these encounters, Dungeon Masters should focus on:
- The number of encounters per type of terrain (forest, mountains, caves, etc.)
- The frequency of encounters with specific creatures (goblins, wolves, spiders, etc.)
- The difficulty level of each encounter based on player level
- The loot or rewards associated with each encounter
- Environmental hazards present in each encounter location
Crafting Narrative Encounters
In addition to combat-focused encounters, creating narrative-driven scenarios is crucial for adding depth to the players’ experiences. These narrative encounters can involve interactions with NPCs, moral dilemmas, or uncovering long-forgotten secrets hidden within the wilderness.
By intertwining combat and narrative-driven encounters, players are presented with a multi-faceted adventure that challenges their problem-solving skills, ethics, and combat prowess.
Having explored the dangers of the unknown wilderness around Phandalin, it’s clear that careful planning and attention to detail are essential elements in crafting a captivating and immersive Dungeons & Dragons campaign experience.
Pursuit of Hidden Treasures
When it comes to D&D campaigns, the joy of uncovering secret stashes of treasure and valuable items can be one of the most rewarding aspects. Yet, without a reliable guide, players may find themselves lost or unable to locate these sought-after treasures. This is where detailed maps become an invaluable aid for adventurers.
Player characters often seek hidden treasures while exploring remote areas or delving into dungeons. A well-crafted map not only provides a visual layout of the terrain but also clues to hidden doors, concealed compartments, and traps that protect these precious valuables. As the dungeon master, you possess a unique opportunity to add layers of intrigue and excitement by embedding clues within the maps that hint at these hidden treasures.
It’s important to remember that a map with careful markings can reveal symbols or messages that indicate potential locations for treasure or valuable items. For example, a drawing of a skull might signify a dangerous encounter, while a cryptic note inscribed on the map could lead to an undiscovered chamber filled with riches.
Moreover, maps can serve as more than just a tool for finding loot; they can also be integral to unraveling the mysteries woven into the adventure. When used strategically, these maps can require players to utilize their problem-solving skills and intuition to decode scenarios presented by carefully designed puzzles or intricate riddles.
The Power of Visual Aids
Visual aids often play a crucial role in enhancing gameplay experiences for both dungeon masters and players. Maps can serve as an effective storytelling tool, providing a tangible representation of the challenges and rewards awaiting the adventuring party. At the same time, they offer a sense of direction and purpose during exploration, helping maintain engagement and enthusiasm throughout the campaign.
Imagine your party stumbling upon an ancient tomb marked on their map as “Beware: Guardian Within.” This notation signals that there may be powerful adversaries lurking within its depths.
As players uncover more information about this location—perhaps through conversations with NPCs or hidden lore scattered throughout the campaign—they may realize that this guardian holds the key to unlocking an extraordinary treasure concealed deep within the tomb.
In such cases, a well-designed map not only aids in spatial navigation but also serves as a catalyst for thought-provoking discussions among players as they piece together potential strategies and theories based on what they’ve uncovered so far.
It’s clear that maps can elevate gameplay experiences by guiding players through intricate scenarios, fostering teamwork and creativity, and offering tantalizing glimpses into elusive treasures waiting to be discovered.
As we move forward in our exploration of D&D adventures, let’s plunge into the depths of excitement found in Dwarven Excavations.
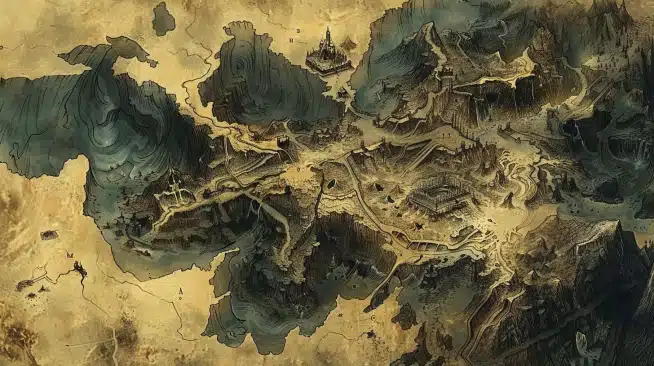
Diving into Dwarven Excavations
The underground world of Wave Echo Cave exerts a magnetic attraction for all levels of adventurers. As your party journeys deeper into this extraordinary place, they’ll encounter various creatures and obstacles, making it essential to have a clear understanding of the cave’s twists and turns. The maps provided are timeless tools that pave the way for the eager explorer.
Understanding these maps can unlock a chest of rewards for both the Dungeon Master and players.
Each chamber within the cave is riddled with unique challenges, waiting to test the wits and combat prowess of anyone daring enough to enter. But mastery of these maps won’t just reveal where enemies or treasures lie; it also enriches the role-playing aspect by providing a vivid portrayal of the environment.
It’s not just about navigation; it’s about immersing players in an environment laden with ancient history, hidden threats, and unforeseen allies. Significant features such as the Forge of Spells or the Stone Bridge point towards rich narratives that add depth to your game.
The layout and structure of these maps embody an immersive experience that gives life to your storytelling.

Some might find navigating through these complex underground structures cumbersome at first, but with practice and patience, it becomes an exhilarating part of the game.
Venturing through these underground passages is all about discovery and overcoming obstacles—each dungeon chamber presents an opportunity for clever strategy, tactical planning, and thrilling combat.
Understanding and utilizing these maps well can turn what seems daunting into an exciting adventure filled with challenges and excitement that have many epic tales yet to be told.
In preparing for your next expedition, it’s crucial to uncover the secrets hidden within the Cragmaw Hideout. By gaining insight into this concealed enclave, your party can better prepare themselves for what lies ahead.
The Cragmaw Hideout Revealed
The Cragmaw Hideout isn’t your typical friendly neighborhood hideaway. No, it’s a haven for goblins and all things sneaky and cunning. As a dungeon master or player, you want to be able to visualize this space so that you can strategize accordingly. Detailed maps are vital tools for creating an immersive experience, both for players and dungeon masters alike.
These maps provide a complete layout of the hideout, illustrating the nooks and crannies of the caverns where goblins await, providing dungeon masters with a visual aid when describing the environment. Imagining an underground lair such as the Cragmaw Hideout without a map is like trying to navigate a dark tunnel without a torch—dangerous and disorienting.
In addition to helping dungeon masters breathe life into the environment, these maps also aid in managing combat encounters. With a clear visual representation of the hideout, both dungeon masters and players can devise and execute strategies more effectively.
It’s important to note that the Cragmaw Hideout is only one example of the many intricate locations within The Lost Mine of Phandelver adventure. Each location presents its own unique challenges and adversaries, making the inclusion of detailed maps a crucial aspect of any campaign utilizing this adventure module.
Maps offer players an opportunity to gain insight into the lay of the land, anticipating potential threats before they materialize.
For instance, knowing that there are 8 goblins lurking within the hideout whose numbers they’d be facing can inform players’ decisions regarding their approach to stealth, combat, negotiation, or exploration within this treacherous domain.
By providing these insights, detailed maps enhance immersion by enabling players to inhabit their characters more fully within the world of The Lost Mine of Phandelver.
In essence, detailed maps are indispensable assets for navigating complex environments and creating memorable experiences within The Lost Mine of Phandelver campaign, making them essential tools for enabling both dungeon masters and players to engage with this enthralling adventure on a deeper level.
With detailed maps at your disposal, you’re not just exploring The Lost Mine of Phandelver; you’re living it.